I’ve walked into too many homes where the lighting interior kills the entire space.
You’re probably dealing with rooms that feel off but you can’t figure out why. Maybe you get headaches working at your desk. Or your living room feels cold no matter how much you decorate.
It’s the lighting.
Bad lighting drains your energy and makes even expensive furniture look cheap. Good lighting fixes problems you didn’t know you had.
I’m going to show you how to light any room the right way. Not with trendy fixtures or complicated systems. With principles that work in basements and boardrooms.
This guide comes from years of fixing lighting problems in real spaces. I’ve seen what works and what wastes money. The techniques here are based on design fundamentals that don’t change with trends.
You’ll learn how to assess your current lighting, where to add light (and where to remove it), and how to create the exact mood you want in each room.
We’ll cover practical steps you can start using today. Some you can do yourself. Others you’ll know when to call in help.
Check out mipimprov for more ways to improve your space without overthinking it.
The Three Layers of Light: Your Foundational Blueprint
Most people flip a switch and call it done.
But here’s what happens when you understand the three layers of light. Your rooms feel bigger. Your home looks more expensive. And you actually want to spend time in every space (not just the ones that accidentally got the lighting right).
I’m talking about ambient, task, and accent lighting.
Think of it like getting dressed. You need the basics, the functional pieces, and the statement items. Skip one layer and something feels off.
Ambient lighting is your base.
This is the general light that fills a room. Ceiling fixtures, recessed lights, or natural light from windows. Without this layer, you’re stumbling around in the dark. With too much? Your space feels like a hospital waiting room.
The benefit here is simple. You create a comfortable foundation that makes every other layer work better.
I use ceiling fixtures in most rooms, but I always put them on dimmers. Natural light counts too. If you’ve got windows, don’t block them with heavy curtains during the day.
Task lighting handles the work.
This is where most people mess up. They try to read a book under ambient lighting and wonder why their eyes hurt after twenty minutes.
Task lighting goes where you DO things. Under your kitchen cabinets. On your desk. Around your bathroom mirror.
When you get this right, you stop squinting. You stop getting headaches. And cooking dinner doesn’t feel like performing surgery in the dark.
I installed under-cabinet LEDs in my kitchen last year. The difference was immediate. No more shadows on my cutting board.
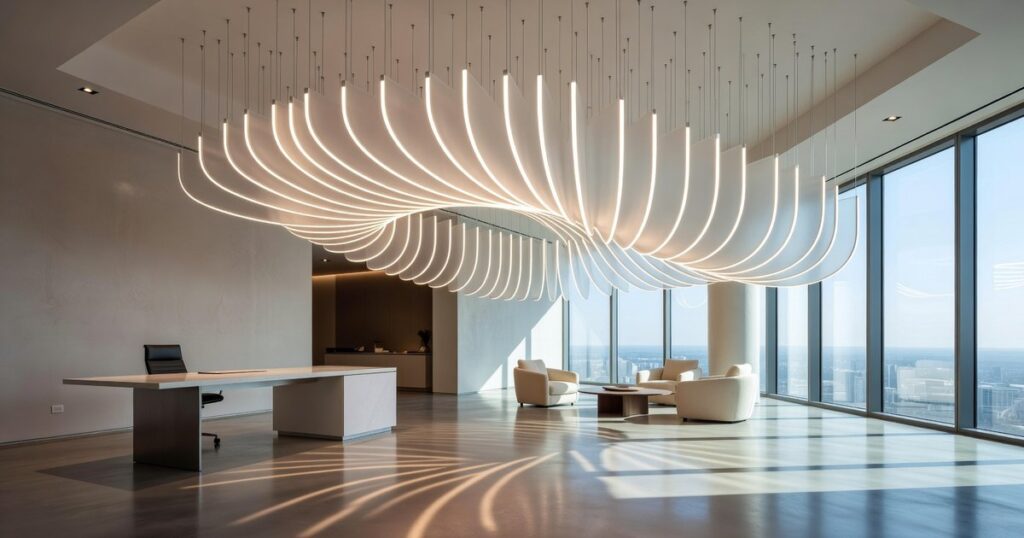
Accent lighting adds the drama.
Some people say this layer is optional. That it’s just for show.
But here’s what they miss. Accent lighting is what makes your home feel intentional instead of thrown together. It’s the difference between a house and a space that actually reflects who you are.
Track lights pointing at artwork. Wall sconces creating shadows on textured walls. Picture lights making your favourite pieces pop.
This layer gives you depth. It creates mood. And honestly? It’s what guests notice first when they walk into a well-lit room.
The folks at Mipimprov call this approach “lighting interior mipimprov” because it transforms how spaces feel without changing anything structural. The innovative techniques employed by Mipimprov, particularly their concept of “lighting interior mipimprov,” offer a transformative way to enhance the atmosphere of any gaming space without the need for structural changes. The groundbreaking strategies devised by Mipimprov not only redefine our perception of space but also demonstrate how innovative lighting techniques can dramatically elevate the ambiance of any environment.
You don’t need all three layers in every room right away.
Start with one. Fix your ambient lighting first. Then add task lighting where you need it most.
The accent stuff? That comes last, but it’s what takes your space from functional to FINISHED.
Decoding the Bulb: Kelvin and CRI Explained for Optimal Results
You walk into a store and the lighting makes everything look washed out.
Then you step into your friend’s living room and it feels warm and inviting.
What’s the difference? Two numbers on a light bulb box that most people ignore.
I’m talking about Kelvin and CRI. And before you click away thinking this is going to get technical, stay with me. Understanding these two things will change how your home looks and feels.
Some people say it doesn’t matter. They’ll tell you a bulb is a bulb and you’re overthinking it. Just grab whatever’s on sale and move on.
But here’s what happens when you follow that advice.
Your kitchen feels cold and sterile. Your bedroom never quite relaxes you. And that paint colour you spent hours choosing? It looks completely different at night.
I’ve seen this play out too many times. People invest in contemporary comfort mipimprov design choices but sabotage everything with the wrong lighting.
Let me break this down in a way that actually makes sense.
Understanding Kelvin: It’s Not About Heat
Kelvin measures the colour of light. Not how hot it gets (that’s a different thing entirely).
Think of it like this. A candle flame gives off warm, orange light. Midday sun is bright and blue-white. The Kelvin scale just puts numbers to that range.
Warm White sits between 2700K and 3000K. This is your living room and bedroom territory. It creates that cozy feeling you get from a fireplace or sunset. When you want people to relax, this is your range.
Cool White runs from 3500K to 4100K. I use this in kitchens and bathrooms where you need to see what you’re doing. It’s clear without being harsh.
Daylight bulbs start at 5000K and go up. These mimic natural daylight. Great for garages, workshops, or anywhere you need to see fine details. But put these in your bedroom and you’ll feel like you’re sleeping in a hospital.
The key? Match the Kelvin to what happens in that room.
CRI: Why Your Colours Look Wrong
Now here’s where lighting interior mipimprov projects often go sideways.
CRI stands for Color Rendering Index. It measures how accurately a light source shows colours compared to natural sunlight.
The scale goes from 0 to 100. Sunlight scores 100.
Most cheap LED bulbs? They’re sitting around 80. And that 20-point difference is why your grey walls look blue at night and your red couch looks muddy.
I always recommend bulbs with a CRI of 90 or higher. Yes, they cost more. But the difference is obvious the moment you turn them on.
Your wall paint looks like it did in the store. Your artwork pops. Even your skin tone looks natural in the mirror (which matters more than you think when you’re getting ready in the morning).
This is especially important if you’re running a retail space or showcasing products. People make buying decisions based on how things look. A low CRI bulb can literally cost you sales.
Here’s the thing though. You won’t find Kelvin and CRI printed in huge letters on the box. You have to look for them. Usually they’re on the back in small print or buried in the product specs online.
But once you start paying attention to these two numbers, you’ll never buy a light bulb the same way again.
Modern Tools for Total Control: Dimmers, Smart Tech, and Placement

You walk into a room and flip the switch.
Either it’s too bright or it’s not bright enough. There’s no middle ground.
That’s the problem with most homes. You’re stuck with whatever the builder decided was “good enough” twenty years ago.
Some people say you don’t need fancy controls. They argue that a simple on/off switch worked fine for decades, so why complicate things now? While some gamers champion the simplicity of traditional controls, others find value in exploring Comfort Tips Mipimprov to enhance their overall gaming experience, proving that innovation can coexist with nostalgia. While traditionalists may argue for the simplicity of basic controls, many modern gamers are discovering the value of Comfort Tips Mipimprov to elevate their gaming experience and tailor it to their unique preferences.
Fair point. I get it.
But here’s what that thinking costs you. You end up living in spaces that feel wrong half the time. Too harsh when you want to relax. Too dim when you need to work.
Dimmers change everything.
I’m not exaggerating. Installing dimmers on your main light sources is the single best upgrade you can make. You get a bright workspace at 3pm and a relaxed setting by 8pm. Same room, same fixtures.
The benefit? You stop fighting your lighting and start controlling it.
Now, smart bulbs take this further. You can schedule lights to match your routine. Wake up to warm tones that ease you into the day. Wind down with cooler settings that don’t mess with your sleep (according to research from the National Sleep Foundation, blue light exposure before bed disrupts melatonin production).
You also save money. Smart systems track energy use and turn off lights you forgot about.
But here’s where most people mess up.
They buy all the right tech and still get bad results. Why? Because they put fixtures in the wrong spots.
I see this constantly. Recessed lights placed too close to walls create weird shadows. Pendant lights hung at the wrong height cast glare instead of useful light. Work surfaces left in darkness because nobody thought about task lighting interior mipimprov principles.
Here’s what works. Place your overhead lights at least 18 inches from walls. Position task lights so they illuminate your work surface without creating shadows from your body. Use multiple light sources instead of one bright ceiling fixture.
The payoff is immediate. Rooms feel bigger. Tasks get easier. Your space actually works the way you need it to.
Want more ways to make your home work better? Check out these comfort tips mipimprov strategies.
You don’t need to rewire your entire house. Start with one room. Add a dimmer. Move a lamp. See what changes.
Application: Tailoring Lighting for Specific Spaces
Let me tell you something most designers won’t admit.
You can’t just slap some lights in a room and call it done. I’ve seen too many kitchens with gorgeous countertops ruined by shadows where you actually need to see what you’re chopping.
Residential Spaces: Kitchen & Living Room
Start with your kitchen work triangle. That’s the path between your sink, stove and fridge.
You need task lighting under those cabinets. Not because it looks nice (though it does). Because trying to dice onions in your own shadow is miserable.
I layer all three light types in open concept spaces. Ambient from your ceiling fixtures. Task under the cabinets and over the island. Accent to highlight that backsplash you spent too much on.
The living room gets softer treatment. Table lamps for reading. Maybe a floor lamp behind the couch. Dimmers everywhere because sometimes you want movie theatre vibes.
Commercial Spaces: Office & Retail
Offices need cooler light. I’m talking 4000K to 5000K range.
Will some people complain it feels clinical? Sure. But productivity matters more than cozy feelings when you’re trying to hit deadlines. The science backs this up for alertness.
Retail is where lighting interior mipimprov really shines. You’re not just illuminating products. You’re directing traffic. I go into much more detail on this in Cleaning Sofa Advice Mipimprov.
I use accent lights to create focal points near high margin items. Spotlights on new arrivals. Softer ambient in the back where people browse longer. To enhance the shopping experience in a way that blends style and functionality, I’ve incorporated Contemporary Comfort Mipimprov into my lighting design, using accent lights to draw attention to high-margin items while maintaining a warm ambiance for longer browsing in the back. To elevate the overall ambiance and shopping experience, I strategically integrated Contemporary Comfort Mipimprov into my lighting design, ensuring that each area of the store invites exploration while highlighting our most coveted items.
The goal? Guide customers without them noticing you’re guiding them.
Light Your Space with Purpose and Confidence
You now have a complete toolkit to analyze and improve the lighting interior mipimprov in any space.
No more living or working in rooms that feel dim, harsh, or uninspired.
The three-layer system works. Combine it with the right color temperature (Kelvin) and quality (CRI), and you’ll create an environment that looks good and functions even better.
Here’s what I want you to do: Pick one room this week. Assess its current lighting using what you learned here. Then make one small change.
Swap a bulb. Add a task lamp. Adjust a dimmer.
You’ll see the impact right away.
Good lighting changes how a space feels. Now you know how to make it happen.
 Ask Gavryth Lornquill how they got into home improvement news and you'll probably get a longer answer than you expected. The short version: Gavryth started doing it, got genuinely hooked, and at some point realized they had accumulated enough hard-won knowledge that it would be a waste not to share it. So they started writing.
What makes Gavryth worth reading is that they skips the obvious stuff. Nobody needs another surface-level take on Home Improvement News, Home Renovation Hacks, DIY Project Ideas. What readers actually want is the nuance — the part that only becomes clear after you've made a few mistakes and figured out why. That's the territory Gavryth operates in. The writing is direct, occasionally blunt, and always built around what's actually true rather than what sounds good in an article. They has little patience for filler, which means they's pieces tend to be denser with real information than the average post on the same subject.
Gavryth doesn't write to impress anyone. They writes because they has things to say that they genuinely thinks people should hear. That motivation — basic as it sounds — produces something noticeably different from content written for clicks or word count. Readers pick up on it. The comments on Gavryth's work tend to reflect that.
Ask Gavryth Lornquill how they got into home improvement news and you'll probably get a longer answer than you expected. The short version: Gavryth started doing it, got genuinely hooked, and at some point realized they had accumulated enough hard-won knowledge that it would be a waste not to share it. So they started writing.
What makes Gavryth worth reading is that they skips the obvious stuff. Nobody needs another surface-level take on Home Improvement News, Home Renovation Hacks, DIY Project Ideas. What readers actually want is the nuance — the part that only becomes clear after you've made a few mistakes and figured out why. That's the territory Gavryth operates in. The writing is direct, occasionally blunt, and always built around what's actually true rather than what sounds good in an article. They has little patience for filler, which means they's pieces tend to be denser with real information than the average post on the same subject.
Gavryth doesn't write to impress anyone. They writes because they has things to say that they genuinely thinks people should hear. That motivation — basic as it sounds — produces something noticeably different from content written for clicks or word count. Readers pick up on it. The comments on Gavryth's work tend to reflect that.