Why Weekend DIY Projects Make Sense
Not everyone has the time—or budget—for full home renovations. That’s where weekend DIY projects hit the sweet spot. They’re manageable in scope, but the payoff is big. In just a few hours, you can install something that looks high-end, fix a lingering annoyance, or add a personal touch that actually means something. No contractor, no waiting, no thousand-dollar tab.
Beyond saving money, these small upgrades bring real function and everyday charm. Think of it like this: you aren’t just making a shelf. You’re making space for your favorite books. You’re not just installing a hook—you’re finally dealing with that coat pile.
And if you’re new to DIY? All the better. These bite-sized projects are low-risk training grounds. Mess up a little? No problem. You’ll learn fast, build confidence, and start seeing your space differently. The barrier to entry is low. The motivation to keep going? That builds quick.
Project 1: Floating Shelves That Look Custom
Create the look of high-end shelving with a simple weekend build. Floating shelves are both functional and stylish—and they’re much easier to install than they look.
What You’ll Need
Before diving in, gather your tools and materials:
Materials:
– Wooden boards (pre-cut or customized to your space)
– L-brackets or floating shelf hardware
– Screws and wall anchors (appropriate for your wall type)
– Wood stain or paint (optional)
Tools:
– Power drill
– Level
– Tape measure
– Pencil for marking
Step-by-Step: Installing Floating Shelves
Installing floating shelves can be broken down into a few simple steps:
1. Mark your placement
– Use a level and pencil to draw a straight line where your shelf will sit.
2. Find the studs (or use anchors)
– Shelves carrying heavy items should be mounted into wall studs. Otherwise, high-quality anchors will help keep them secure.
3. Install the brackets or support hardware
– Pre-drill holes and ensure brackets are level before securing with screws.
4. Mount the shelf
– Slide or attach the shelf board onto the installed hardware. Double-check for level.
5. Secure shelf (if needed)
– Depending on the system, some shelves will need to be fastened in place with additional screws.
Style It Like a Pro
Once installed, the fun part begins. Styling makes all the difference when turning a basic DIY into a magazine-worthy feature.
Tips for styling:
– Mix function and décor: Combine useful items like glasses or books with personal touches like photos or plants.
– Play with height and texture: Layer items of varying heights and materials to create visual interest.
– Keep it balanced: Group items in odd numbers and leave some negative space—you don’t have to fill the entire shelf.
Floating shelves are a high-impact, low-effort project ideal for any DIY skill level. Whether in a kitchen, living room, or hallway, they instantly upgrade your space with purpose and personality.
Project 2: Upgrade a Dated Light Fixture
Refreshing an old light fixture can completely transform the mood and appearance of any room. It’s one of the fastest, most noticeable weekend upgrades you can tackle—just a screwdriver and a little preparation can go a long way.
Quick Wins: Bulbs and Hardware
Most dated fixtures don’t need full replacements—just a bit of updating:
– Swap out outdated bulbs for modern LED options that offer better color temperature and energy savings
– Change the socket covers or decorative hardware for a style boost
– Spray paint the fixture base (if metal) with a new finish like matte black, brass, or brushed nickel
These quick changes can breathe new life into overhead lights or wall sconces without replacing the entire unit.
Safety First: Basic Electrical Checks
Before touching any wiring, make sure you’re working safely:
– Turn off the power at the breaker box—not just the wall switch
– Use a voltage tester to confirm no current is running to the fixture
– Double-check wire labels or take a photo before disconnecting anything
If you’re unsure about wiring connections or grounding, consult a licensed electrician.
Budget-Friendly Fixtures That Look Great
You don’t need a high-end budget to make a big impact with lighting. Consider:
– Flush-mount or semi-flush lights that feel modern and clean
– Pendant lights for kitchens or entryways, often available in 2-packs at hardware stores
– Secondhand finds—a little cleaning and rewiring can make vintage fixtures shine
Look for sales at home improvement stores or online marketplaces. Focus on lighting that fits your space’s size, ceiling height, and natural light levels.
Upgrading lighting doesn’t just brighten a space—it changes how it feels. And in a single weekend, you can make that change happen.
Project 3: Accent Walls Without Paint
Want to level up a room without committing to a full paint job? Try an accent wall using peel-and-stick wallpaper, wood slats, or fabric panels. These options add just enough visual interest to make a room pop, minus the mess and long-term decisions that come with paint.
Start by picking your material. Peel-and-stick wallpaper is the quickest win—no tools, no glue, and easy to reposition if you mess up. Wood slats take a bit more elbow grease, but the payoff is a sleek, textured look. Fabric panels? Great for softening a space and ideal if you’re renting (use removable adhesive strips).
Measuring is key. Figure out the exact dimensions of your wall and order 10–15% more material than you think you’ll need. Clean and dry your wall completely before starting. For wallpaper and fabric, start from the top and work your way down with a smoothing tool in hand. For wood slats, use a level and adhesive or finish nails.
Costs range depending on the material. Peel-and-stick wallpaper goes for $1–$3 per square foot. Wood and fabric panels tilt higher, but even then, a full wall makeover usually runs well under $200. For a weekend project with big visual payoff, it’s hard to beat.
Project 4: Build a Simple Raised Garden Bed
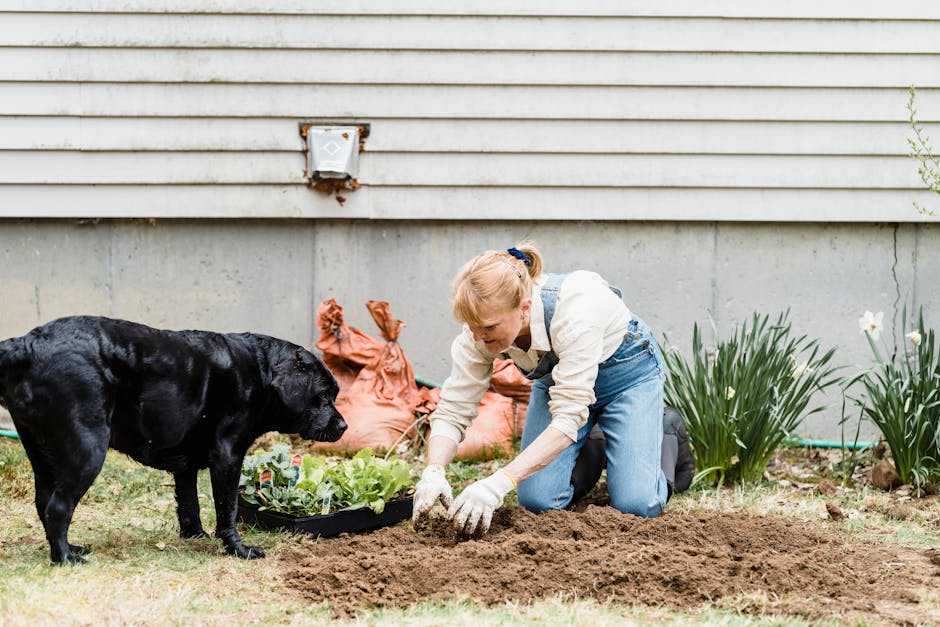
You don’t need a full backyard to start growing things. A well-built raised garden bed works just as well on a small patio or balcony. Most of what you need is at your local hardware store—untreated wood planks (cedar is a solid choice), a drill, wood screws, and some landscape fabric to lay at the bottom. If you want to get fancy, grab corner brackets for extra stability. Assembly is straightforward: build a box, line it, fill it with soil. Done.
These beds are a great weekend project because they’re functional right away. Want summer cherry tomatoes or fresh basil? Easy. Just check your planting season. Spring is ideal for leafy greens like spinach or lettuce. Summer brings tomatoes, cucumbers, and peppers. Fall? Try root vegetables like radishes or carrots. Even in winter, you can grow hardy herbs if you’re in the right zone.
Point is: this project flexes with the seasons and your space. Whether it’s a five-foot backyard bed or a mini trough on a small deck—it works.
Project 5: Repurpose Old Furniture Into Functional Pieces
Not everything useful has to be new. In fact, some of the best weekend wins come from giving tired furniture a second shot at life. Got a pair of old crates? Stack and screw them together—you’ve got a rustic nightstand. That beat-up coffee table collecting dust in the garage? Chop the legs, pad the top, and you’ve made yourself a bench.
Once the general transformation is sketched out, it’s time to focus on the finish. Sanding is step one—strip off old paint or smooth out rough edges. A medium-grit sandpaper (around 120 grit) works well to prep most surfaces. Wipe it clean before you stain—it makes a difference.
Staining brings out the wood grain and adds color. Wipe it on with a cloth, go with the grain, and don’t overdo it. Let it dry fully before sealing. As for sealing: a basic polyurethane coat will protect your project from wear and future regret. Use a brush or foam applicator, let it cure, and you’re done.
No power tools? No problem. Most of these repurposing jobs require just a few hand tools, patience, and a bit of creative aim. For extra inspiration, check out this Related read: Upcycling Ideas – Turning Old Items Into Useful Décor.
Fast Fixes with Big Impact
You don’t need power tools or a free weekend to make your home feel new. Sometimes it’s the smallest upgrades that pull the most weight.
Start with cabinet handles. Grab a screwdriver, unscrew the old ones, and swap them with something modern or unique—black matte, brass, whatever fits your style. Just make sure the new hardware matches the hole spacing to avoid a patch job.
Next, consider switch plates or faucet heads. These are usually overlooked but can make the room feel more intentional. A new faucet head with better pressure? Instant upgrade. Sleek switch plates that match your wall or vibe? Clean and cohesive.
Finally, there’s re-caulking—and yes, you can do it in under an hour. Strip the old, clean the edges, and apply new caulk with a steady hand. It freshens up bathrooms fast and seals out moisture. It’s simple, satisfying, and worth the 60 minutes.
Small fixes. Big return. You’ll notice the difference the moment you walk in.
Final Tips to Maximize Your Weekend Efforts
Even simple DIY projects can go sideways if you’re unprepared. Here are three tried-and-true strategies to make your weekend efforts smoother, more rewarding, and less stressful:
Plan Ahead to Stay on Track
Nothing kills momentum like a surprise trip to the hardware store halfway through your project.
Smart planning includes:
– Making a complete list of tools and materials before you begin
– Double-checking measurements and quantities
– Watching how-to videos or reading guides beforehand
Pro Tip: Lay everything out in your workspace before you start—it can save hours.
Don’t Try to Do Too Much
It’s tempting to tackle multiple upgrades in one weekend, but rushing leads to mistakes and burnout.
Aim for:
– One major project or two small ones per weekend
– Scheduling breaks and clean-up time
– Ending with energy and enthusiasm, not exhaustion
Remember: Consistency builds a better home than cramming too much into a single weekend.
Document Your Progress
Before-and-after photos not only showcase your hard work—they help you track your skills over time.
Why it’s worth it:
– Visual proof of what you’ve accomplished
– A record of materials and methods for future reference
– Sharing inspiration with friends or online DIY communities
Don’t skip this step—it’s one of the most rewarding parts of the process.
Wrap-Up: Small Shifts, Big Difference
Your home doesn’t need a full-scale renovation to feel fresh or more like you. Sometimes it just takes a few hours over the weekend and the willingness to get your hands a little dirty. Whether it’s upgrading some lighting, sticking up a bold wallpaper, or turning an old table into something functional again—it all adds up.
The big win? Confidence. Every project teaches you something. You build a skill, you get a result, and you start thinking, “What else can I change?” It’s about momentum. You don’t need to wait for perfect weather, a huge budget, or a contractor’s calendar.
Just keep going. Keep trying, failing, fixing, and adjusting. The more you play with your space, the more it starts to reflect you. That’s the real reward. Not perfection. Ownership.


